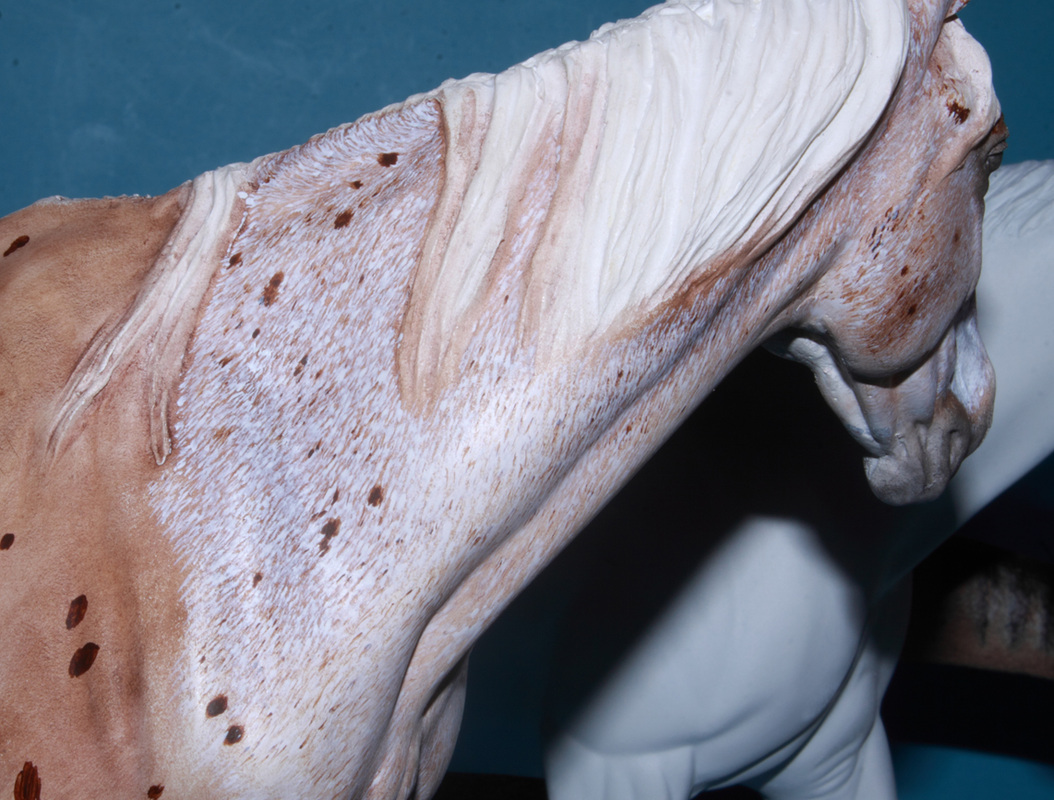
We left off last time with a discussion of how I created my strategy to tackle a likeness of a real horse named Rocky. At the end of that first bit, I had begun roaning the neck and shoulder on one side. And from there, it was a heck of a lot more roaning - tick, tick, tick! Despite the lack of speed in tackling this, I can't say enough how taking my time was making for the effect I wanted to achieve. I won't bore you with a ton of details because the hours invested are too numerous. All I can say is take your time and work slowly. As for tools, I resorted to my trusty Kolinsky Reservoir Liner Brush for the bulk of the work doing small ticks in an off white mix or very light brown or grey mixes (Titanium White and a tiny bit of Burnt Umber or grey) depending on the shade I needed and followed hair growth patterns as best as I could and making sure the hairs were in different positions so not to look like they were in straight lines across the model.
| 
|
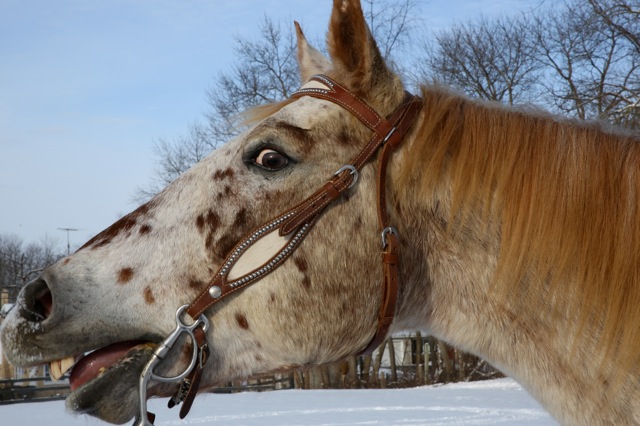
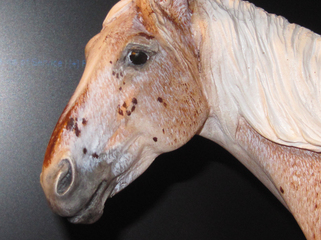
At one point, I decided to really focus on his face. Look below at that ham!! His markings are just so stunning and he seems like a wonderful horse to be around! Oh, and I should note, please, all images are copyright of either myself or Rocky's owner. Please do not download or redistribute.
|  |
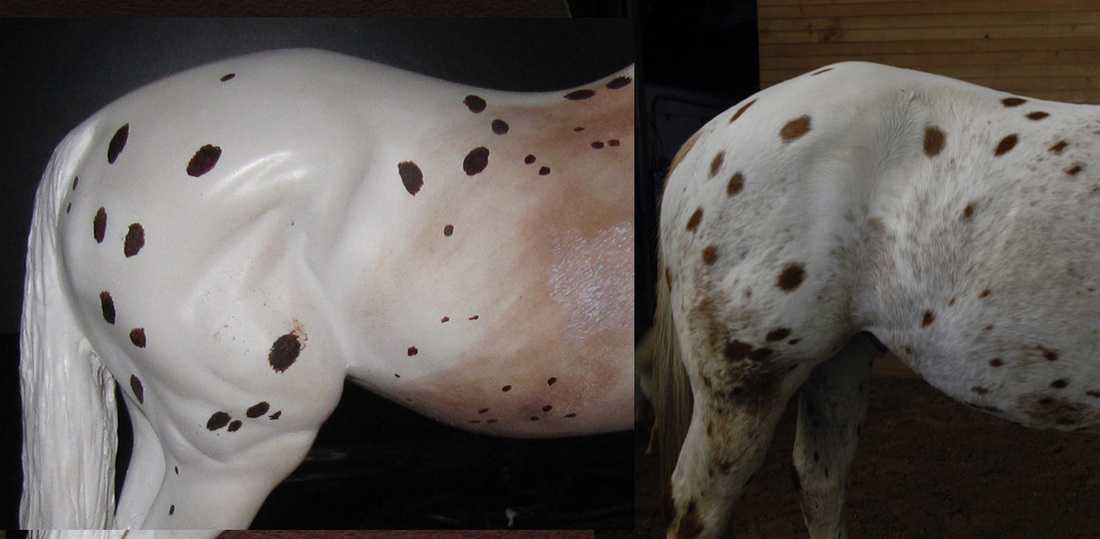
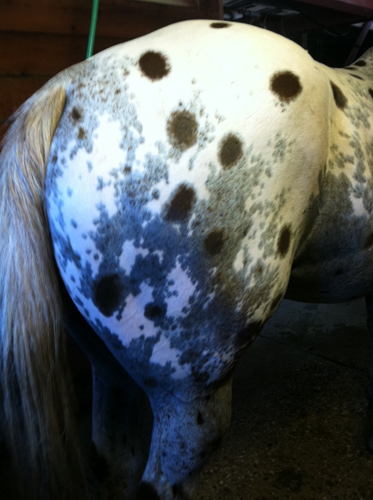
Moving forward to other sections, I would pull up the images of the real horse and study them. As you can see with these "butt shots", Rocky's blanket is pretty noticeable even with all the heavy roaning. Achieving that made me realize my strategy to put down some darker color first and then use thin layers of light color to roan and more or less straight white to shape the blanket. And what to do about the underlying dark areas within the blanket?

| 
|
Enter Shannon and her camera! After a nice bath, she gathered a bunch of images of Rocky all wet and boy can you see the areas of dark skin beneath the lighter fur. Using these images, I blocked in color using dark mixes of grey with burnt umber and a touch of Mars Black.

| 
|
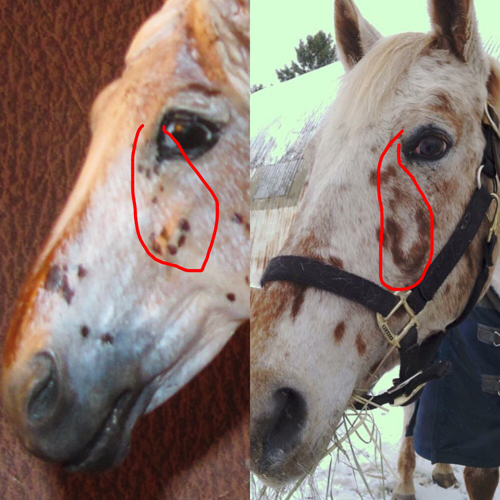
Once I felt I had made some decent headway on the model, I took a series of images and sent them on to Rocky's owner for a hard critique. No holds barred!! And thank goodness for Photoshop! With a red "pen" and pairs of images, she put together angles I had sent of the model and matched them to images she had of Rocky circling areas needing adjusting.

| 
|
From here, comes the phase of adjusting and detailing - and that will be for the next time!
 RSS Feed
